
Featured post

XM Cloud content sync from prod to uat or UAT to prod step by step

When working with Sitecore, it’s common to need content synchronization across environments. Today, I’ll walk you through the steps to sync content from Production to UAT/TEST and vice versa. Steps to Follow 1. Set Up Your Workspace Create a folder on your computer where you will manage the script files and exported data. Open the folder path in PowerShell to begin scripting. We need to run some scripts in PowerShell to update the folder with the basic requirements for syncing content. PS C:\Soft\ContentSync> dotnet new tool-manifest PS C:\Soft\ContentSync> dotnet nuget add source -n Sitecore https://nuget.sitecore.com/resources/v3/index.json PS C:\Soft\ContentSync> dotnet tool install Sitecore.CLI PS C:\Soft\ContentSync> dotnet sitecore cloud login If the above error occurs, you will need to run a different command to resolve the issue. PS C:\Soft\ContentSync> dotnet sitecore init now, Again run above command to open and authenticate with XM Cloud. It will be there a...

insert,delete,update with angularjs and asp.net mvc

CRUD operation with Angularjs and asp.net mvc.

Some of the below point which will discuss  .

·        Create Database & Table
·        Create MVC Project using Visual studio
·        Add Web Api Controller
·        Use AngularJS to Consume WebAPI
·        Perform the CRUD Operation

CREATE TABLE [dbo].[Student](  
    [StudentID] [int] IDENTITY(1,1) NOT NULL,  
    [Name] [varchar](50) NULL,  
    [Email] [varchar](500) NULL,  
    [Class] [varchar](50) NULL,  
    [EnrollYear] [varchar](50) NULL,  
    [City] [varchar](50) NULL,  
 [Country] [varchar](50) NULL


Now open Visual studio create project using mvc . Please see below image .


 Now Going to add API controller . You may see the code which is auto generated

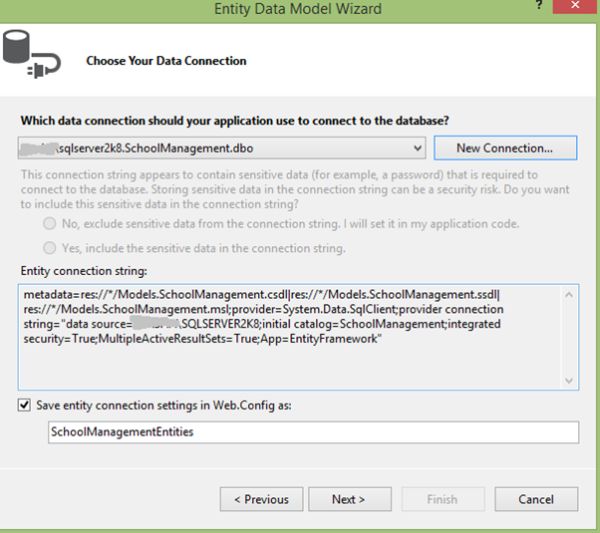
 Select Template API Controller with entity framework.

 See the below code which is generated using api controller.
using System;  

using System.Collections.Generic;  
using System.Data;  
using System.Data.Entity;  
using System.Data.Entity.Infrastructure;  
using System.Linq;  
using System.Net;  
using System.Net.Http;  
using System.Web;  
using System.Web.Http;  
using MVC4_WEBApi_Angular_CRUD.Models;  
  
namespace MVC4_WEBApi_Angular_CRUD.Controllers  
{  
    public class StudentsAPIController : ApiController  
    {  
        private SchoolManagementEntities db = new SchoolManagementEntities();  
  
        // GET api/StudentsAPI  
        public IEnumerable<Student> GetStudents()  
        {  
            return db.Student.AsEnumerable();  
        }  
  
        // GET api/StudentsAPI/5  
        public Student GetStudent(int id)  
        {  
            Student student = db.Student.Find(id);  
            if (student == null)  
            {  
                throw new HttpResponseException(Request.CreateResponse(HttpStatusCode.NotFound));  
            }  
  
            return student;  
        }  
   // PUT api/StudentsAPI/5  
        public HttpResponseMessage PutStudent(int id, Student student)  
        {  
            if (ModelState.IsValid && id == student.StudentID)  
            {  
                db.Entry(student).State = EntityState.Modified;  
  
                try  
                {  
                    db.SaveChanges();  
                }  
                catch (DbUpdateConcurrencyException)  
                {  
                    return Request.CreateResponse(HttpStatusCode.NotFound);  
                }  
  
                return Request.CreateResponse(HttpStatusCode.OK);  
            }  
            else  
            {  
                return Request.CreateResponse(HttpStatusCode.BadRequest);  
            }  
        }  
  
        // POST api/StudentsAPI  
        public HttpResponseMessage PostStudent(Student student)  
        {  
            if (ModelState.IsValid)  
            {  
                db.Student.Add(student);  
                db.SaveChanges();  
  
                HttpResponseMessage response = Request.CreateResponse(HttpStatusCode.Created, student);  
                response.Headers.Location = new Uri(Url.Link("DefaultApi"new { id = student.StudentID }));  
                return response;  
            }  
            else  
            {  
                return Request.CreateResponse(HttpStatusCode.BadRequest);  
            }  
        }  
  
        // DELETE api/StudentsAPI/5  
        public HttpResponseMessage DeleteStudent(int id)  
        {  
            Student student = db.Student.Find(id);  
            if (student == null)  
            {  
                return Request.CreateResponse(HttpStatusCode.NotFound);  
            }  
  
            db.Student.Remove(student);  
  
            try  
            {  
                db.SaveChanges();  
            }  
            catch (DbUpdateConcurrencyException)  
            {  
                return Request.CreateResponse(HttpStatusCode.NotFound);  
            }  
  
            return Request.CreateResponse(HttpStatusCode.OK, student);  
        }  
  
        protected override void Dispose(bool disposing)  
        {  
            db.Dispose();  
            base.Dispose(disposing);  
        }  
    }  
}  


 Now adding another empty controller
 using System;  

using System.Collections.Generic;  
using System.Linq;  
using System.Web;  
using System.Web.Mvc;  
  
namespace MVC4_WEBApi_Angular_CRUD.Controllers  
{  
    public class StudentController : Controller  
    {  
        //  
        // GET: /Student/  
  
        public ActionResult Index()  
        {  
            return View();  
        }  
    }  
}


Now adding AngularJS Library  in project. See the below process.


After addition of angularjs library create some jquery file in your project  see the below code which i added some code in different file of js.

1. Create Module js and  added below code.

var app;  

(function () {  
    app = angular.module("crudModule", []);  

})()  

2. Created Service JS and added below code.

app.service('CRUD_OperService'function ($http) {  
  
    //Create new record  
    this.post = function (Student) {        
        var request = $http({  
            method: "post",  
            url: "/api/StudentsAPI",  
            data: Student  
        });  
        return request;  
    }  
  
    //Get Single Records  
    this.get = function (StudentID) {  
        return $http.get("/api/StudentsAPI/" + StudentID);  
    }  
  
    //Get All Student  
    this.getAllStudent = function () {  
        return $http.get("/api/StudentsAPI");  
    }  
  
    //Update the Record  
    this.put = function (StudentID, Student) {  
        var request = $http({  
            method: "put",  
            url: "/api/StudentsAPI/" + StudentID,  
            data: Student  
        });  
        return request;  
    }  
  
    //Delete the Record  
    this.delete = function (StudentID) {  
        var request = $http({  
            method: "delete",  
            url: "/api/StudentsAPI/" + StudentID  
        });  
        return request;  
    }  
});  

3. Now Added Controller js see below code of controller

Controller.js


app.controller('CRUD_OperController'function ($scope, CRUD_OperService) {  
    $scope.OperType = 1;  
    //1 Mean New Entry  
  
    GetAllRecords();  
    //To Get All Records  
    function GetAllRecords() {  
        var promiseGet = CRUD_OperService.getAllStudent();  
        promiseGet.then(function (pl) { $scope.Students = pl.data },  
              function (errorPl) {  
                  $log.error('Some Error in Getting Records.', errorPl);  
              });  
    }  
  
    //To Clear all input controls.  
    function ClearModels() {  
        $scope.OperType = 1;  
        $scope.StudentID = "";  
        $scope.Name = "";  
        $scope.Email = "";  
        $scope.Class = "";  
        $scope.EnrollYear = "";  
        $scope.City = "";  
        $scope.Country = "";  
    }  
  
   //To Create new record and Edit an existing Record.  
    $scope.save = function () {  
        var Student = {  
            Name: $scope.Name,  
            Email: $scope.Email,  
            Class: $scope.Class,  
            EnrollYear: $scope.EnrollYear,  
            City: $scope.City,  
            Country: $scope.Country  
        };  
        if ($scope.OperType === 1) {  
            var promisePost = CRUD_OperService.post(Student);  
            promisePost.then(function (pl) {  
                $scope.StudentID = pl.data.StudentID;  
                GetAllRecords();  
                ClearModels();  
            }, function (err) {  
                console.log("Err" + err);  
            });  
        } else {  
            //Edit the record                
            Student.StudentID = $scope.StudentID;  
            var promisePut = CRUD_OperService.put($scope.StudentID, Student);  
            promisePut.then(function (pl) {  
                $scope.Message = "Student Updated Successfuly";  
                GetAllRecords();  
                ClearModels();  
            }, function (err) {  
                console.log("Err" + err);  
            });  
        }  
    };  
  
    //To Delete Record  
    $scope.delete = function (Student) {  
        var promiseDelete = CRUD_OperService.delete(Student.StudentID);  
        promiseDelete.then(function (pl) {  
            $scope.Message = "Student Deleted Successfuly";  
            GetAllRecords();  
            ClearModels();  
        }, function (err) {  
            console.log("Err" + err);  
        });  
    }  
  
    //To Get Student Detail on the Base of Student ID  
    $scope.get = function (Student) {  
        var promiseGetSingle = CRUD_OperService.get(Student.StudentID);  
  
        promiseGetSingle.then(function (pl) {  
            var res = pl.data;  
            $scope.StudentID = res.StudentID;  
            $scope.Name = res.Name;  
            $scope.Email = res.Email;  
            $scope.Class = res.Class;  
            $scope.EnrollYear = res.EnrollYear;  
            $scope.City = res.City;  
            $scope.Country = res.Country;  
  
            $scope.OperType = 0;  
        },  
                  function (errorPl) {  
                      console.log('Some Error in Getting Details', errorPl);  
                  });  
    }  
  
    //To Clear all Inputs controls value.  
    $scope.clear = function () {  
        $scope.OperType = 1;  
        $scope.StudentID = "";  
        $scope.Name = "";  
        $scope.Email = "";  
        $scope.Class = "";  
        $scope.EnrollYear = "";  
        $scope.City = "";  
        $scope.Country = "";  
    }  
  
});  


 Now add view of by right clicking on action method inside controller.


 See the view which created by above process.

<html data-ng-app="crudModule">  

@{  
    ViewBag.Title = "Manage Student Information using AngularJs, WEB API & MVC4";  
}  
  
<body>  
    <table id="tblContainer" data-ng-controller="CRUD_OperController">  
        <tr>  
            <td>  
                <table style="border: solid 2px Green; padding: 5px;">  
                    <tr style="height: 30px; background-color: skyblue; color: maroon;">  
                        <th></th>  
                        <th>ID</th>  
                        <th>Name</th>  
                        <th>Email</th>  
                        <th>Class</th>  
                        <th>Year</th>  
                        <th>City</th>  
                        <th>Country</th>  
                        <th></th>  
                        <th></th>  
                    </tr>  
                    <tbody data-ng-repeat="stud in Students">  
                        <tr>  
                            <td></td>  
                            <td><span>{{stud.StudentID}}</span></td>  
                            <td><span>{{stud.Name}}</span></td>  
                            <td><span>{{stud.Email}}</span></td>  
                            <td><span>{{stud.Class}}</span></td>  
                            <td><span>{{stud.EnrollYear}}</span></td>  
                            <td><span>{{stud.City}}</span></td>  
                            <td><span>{{stud.Country}}</span></td>  
                            <td>  
                                <input type="button" id="Edit" value="Edit" data-ng-click="get(stud)" /></td>  
  
                            <td>  
                                <input type="button" id="Delete" value="Delete" data-ng-click="delete(stud)" /></td>  
                        </tr>  
                    </tbody>  
                </table>  
  
            </td>  
        </tr>  
        <tr>  
            <td>  
                <div style="color: red;">{{Message}}</div>  
                <table style="border: solid 4px Red; padding: 2px;">  
                    <tr>  
                        <td></td>  
                        <td>  
                            <span>Student ID</span>  
                        </td>  
                        <td>  
                            <input type="text" id="StudentID" readonly="readonly" data-ng-model="StudentID" />  
                        </td>  
                    </tr>  
                    <tr>  
                        <td></td>  
                        <td>  
                            <span>Student Name</span>  
                        </td>  
                        <td>  
                            <input type="text" id="sName" required data-ng-model="Name" />  
                        </td>  
                    </tr>  
                    <tr>  
                        <td></td>  
                        <td>  
                            <span>Email</span>  
                        </td>  
                        <td>  
                            <input type="text" id="sEmail" required data-ng-model="Email" />  
                        </td>  
                    </tr>  
                    <tr>  
                        <td></td>  
                        <td>  
                            <span>Class</span>  
                        </td>  
                        <td>  
                            <input type="text" id="sClass" required data-ng-model="Class" />  
                        </td>  
                    </tr>  
                    <tr>  
                        <td></td>  
                        <td>  
                            <span>Enrollement Year</span>  
                        </td>  
                        <td>  
                            <input type="text" id="sEnrollYear" required data-ng-model="EnrollYear" />  
                        </td>  
                    </tr>  
                    <tr>  
                        <td></td>  
                        <td>  
                            <span>City</span>  
                        </td>  
                        <td>  
                            <input type="text" id="sCity" required data-ng-model="City" />  
                        </td>  
                    </tr>  
                    <tr>  
                        <td></td>  
                        <td>  
                            <span>Country</span>  
                        </td>  
                        <td>  
                            <input type="text" id="sCountry" required data-ng-model="Country" />  
                        </td>  
                    </tr>  
                    <tr>  
                        <td></td>  
                        <td></td>  
                        <td>  
                            <input type="button" id="save" value="Save" data-ng-click="save()" />  
  
                            <input type="button" id="Clear" value="Clear" data-ng-click="clear()" />  
                        </td>  
                    </tr>  
                </table>  
  
            </td>  
        </tr>  
  
    </table>  
</body>  
</html>  
  
<script src="~/Scripts/angular.js"></script>  
<script src="~/Scripts/angular-route.js"></script>  
<script src="~/Scripts/MyAngularjsScripts/Module.js"></script>  
<script src="~/Scripts/MyAngularjsScripts/Service.js"></script>  
<script src="~/Scripts/MyAngularjsScripts/Controller.js"></script>  


Comments

Popular posts from this blog

How to use WS_Ping_Pro ?

  WS_Ping_Pro is a network troubleshooting tool that allows you to ping and trace route different network hosts to determine connectivity issues. Here's how to use WS_Ping_Pro: Download and install WS_Ping_Pro on your computer. You can download it from the developer's website or from a trusted software repository. Launch WS_Ping_Pro and enter the IP address or hostname of the target host in the "Host" field. You can also choose the type of ping to perform from the "Ping Type" drop-down menu. The options include ICMP, TCP, UDP, and HTTP. Click the "Ping" button to initiate the ping. WS_Ping_Pro will send packets to the target host and measure the response time. You can view the results in the "Ping Results" section, which shows the number of packets sent, received, and lost, as well as the minimum, maximum, and average response times. If you want to perform a trace route, click the "Trace" button. WS_Ping_Pro will send packets ...

Denial of Service (DoS) attack

  A Denial of Service (DoS) attack is a type of cyber attack that targets computer systems or networks by overwhelming them with a flood of traffic, thereby preventing legitimate users from accessing the system or network. DoS attacks are typically carried out using botnets, which are networks of compromised computers that are controlled by a hacker. Here's an example of a DoS attack: Suppose an attacker wants to disrupt the operations of a popular e-commerce website during the holiday shopping season. They could launch a DoS attack against the website's servers, flooding them with a massive amount of traffic and requests. The attacker could use a botnet to generate the traffic, using techniques such as IP spoofing or amplification to make the traffic appear to come from many different sources. The traffic flood will quickly overwhelm the web servers and prevent legitimate users from accessing the website, leading to loss of revenue and reputation damage for the e-commerc...

What is object in C#

Object  : - Object is a instance of class. We can create more than one object a class according to requirements. Suppose we have a class name employee then create obect name of class . In the previous section we have discuss Office Owner will access and use all the Cabinof the Office and its Items. Similarly, to access all Class Method and Variable we use Objects. Example  : Class Employee {  --------- ---------- } Employee emp = new Employee(); here emp is an object of employee Class.

How to Setting up an XM Cloud environment and project ?

   Setting up an XM Cloud environment and project requires the following steps: Sign up for an XM Cloud account: To use XM Cloud, you will need to sign up for an account on their website. You can choose between a free trial or a paid subscription. Create a project: Once you have signed up, you can create a new project in the XM Cloud dashboard. A project represents a set of resources and configurations that are used to manage your customer interactions. Configure your project: You can configure your project by defining settings such as the messaging channels you want to use, the language and region settings, and any other custom settings you need. You can also configure integrations with other systems, such as your CRM or marketing automation platform. Create a conversation flow: A conversation flow is a series of messages and interactions between a customer and your business. You can create conversation flows in XM Cloud using a visual flow designer that allows you to drag an...

How to use Nmap with example

  Nmap is a popular open source network scanning tool used for network exploration, security auditing, and vulnerability testing. Here's an example of how to use Nmap: Open a command prompt or terminal window on your computer. Type "nmap" followed by the IP address or domain name of the target network or device that you want to scan. For example, to scan a website, you might enter: nmap www.example.com Hit enter to start the scan. Nmap will begin probing the target network or device and will display information about the discovered hosts and open ports. You can use various options and flags to customize the scan. For example, the "-sS" flag specifies a TCP SYN scan, which is a stealthy scan method that can bypass some firewall configurations. The "-p" flag specifies the ports to scan. For example, to scan only ports 80 and 443 on a website, you might enter: nmap -sS -p 80,443 www.example.com Hit enter to start the customized scan. Nmap will d...